Successful international travel with 35mm film comes with some extra considerations. One biggie is the dreaded airport security X-ray machine and the questions that come with it. Will it ruin my film? Can I get my film around it??
Other considerations are things like how many cameras to take, how much film to take, which types of film to take, how to safely pack everything, and the list goes on.

All the extra thoughts are worth it through. All of my favorite travel photos are photos that I’ve captured on film. As all film lovers know, there’s a different quality to film that’s hard to replicate. There’s also something special about how intentional it is to shoot film and to just have one or two shots of a single subject. The element of surprise can be fun too.
Here are some tips for success for international travel with 35mm film
1. Pack light
I often travel with two cameras but only end up using one. Even internationally. That’s right, I’ve lugged completely unused equipment across the world and back. In general, it is best to pack light and take just what you’re sure that you want to use.
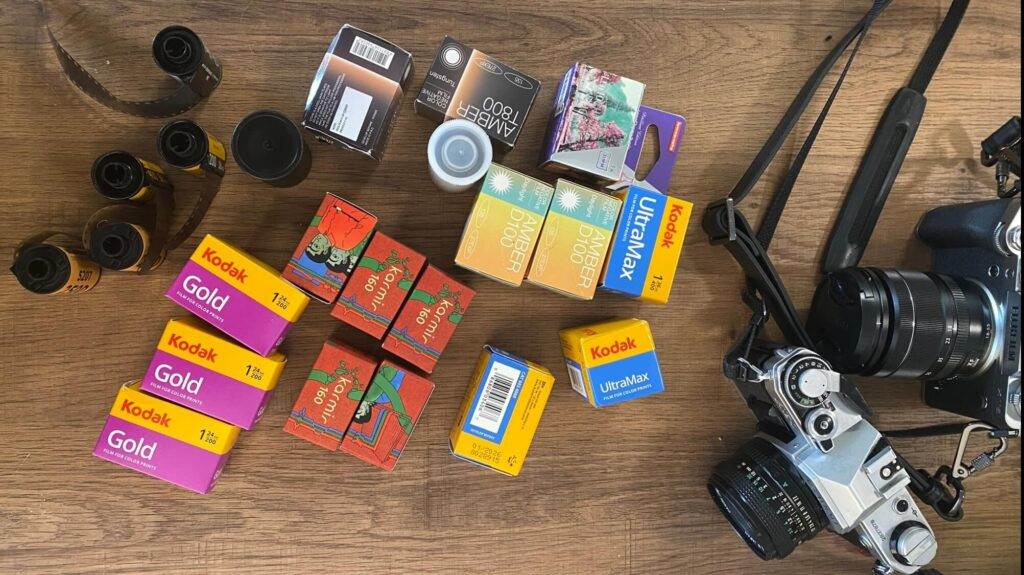
While it can be nice to have every lens and every creative option available to you, international travel also gets busy. If there isn’t a particular reason why you might use something beyond your normal setup then perhaps you don’t need it.
That being said, there are reasons why you might want to travel with multiple cameras.
I usually take two cameras with me when I travel, one film camera and one mirrorless camera.
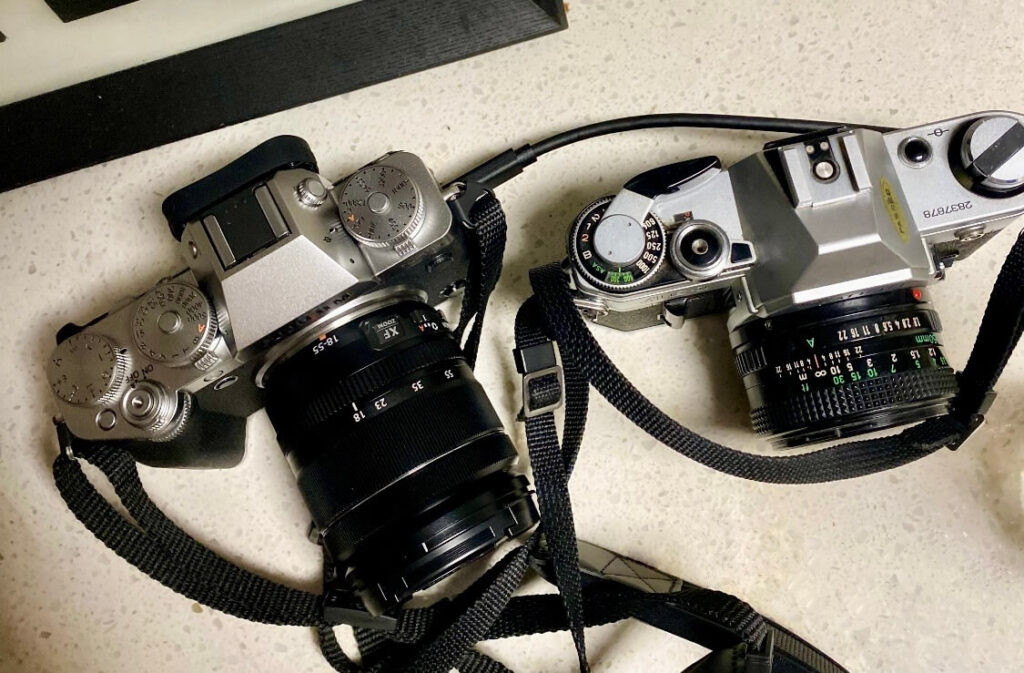
I know this is a post about international tips for film photographers, but some of us also want to capture video! Lately, that’s been my Canon AE-1 and Fujifilm X-T5.
You might have other good reasons for taking multiple film cameras. Maybe you have an expensive Leica setup but you also want a point-and-shoot camera that you can take ziplining. Or perhaps you have a waterproof camera that you just must take to the Canary Islands. Or whatever. There are cases to be made for bringing more than one.
2. Shoot with film you already like
Travel can be a great time to experiment with film stocks, but it also increases the odds of something going unplanned. If you haven’t yet shot on a film stock you might not yet know how to get your preferred results.
Also, you may not know how different film stocks are going to react to going through X-rays. We’ll dive more into that hefty topic shortly. I have had the experience of being forced to send film through airport security X-rays. I have seen firsthand how some brands of film survive it, while other brands of film do not, even when they are all under 800 ISO.
It can be fun to bring a mixture of trusty film stocks, plus something that could provide surprises in a good way.
3. Bring backup batteries
I’ve been shooting film seriously since high school, and I’ve been using the same durable 35mm camera for just as long. At this point, my Canon AE-1 is highly sentimental, and I am probably due for an upgrade. But it is a very trusty camera and it is relatively easy to use, which is good for being on the go.
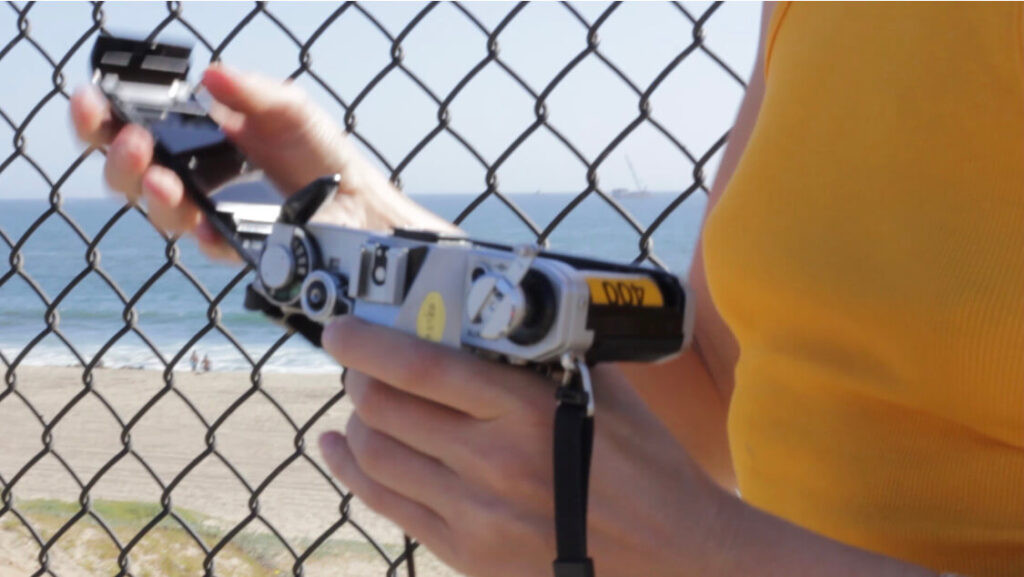
The upside to traveling with a fully manual camera is that there aren’t a lot of extra accessories to deal with. The camera does not need to be charged. The only part of the camera that requires a battery is the internal light meter.
That battery tends to last for months at a time, but I always bring an extra one with me just in case. My battery has run out while traveling before, and they’re not very easy to come by. Canon stopped production of the AE-1 body in the 1980s, and battery trends seemed to have changed as well. The camera takes a 6-volt silver oxide battery, either the PX28 or 4LR44. These generally need to be ordered online or purchased at a film camera store.
This may or may not be true of whatever film camera you shoot on, but it’s something to keep in mind!
4. Use a camera that you’re comfortable using
Going along the topic of ease, make sure that you know how to use the camera that you’re taking with you. If you’re brand-new to a fully manual camera you may not enjoy changing the settings and manually focusing while you’re out and about.
Whenever I’m using a new-ish camera I watch some YouTube university and then go out and practice. I want to be as efficient as possible so that I don’t get slowed down by an unfamiliar environment.
Especially when capturing street photography where moving people are in the mix.

4. Look into travel insurance
Depending on how much your gear is worth and where you travel, it might be worth looking into getting your cameras insured. If you have a home base your insurance might even already cover them. I was pleased to find out that my rental insurance through Lemonade covers my belongings while traveling as well.
5. Protect your camera from theft
Safety is always a consideration when traveling, and keeping your belongings safe is part of that. When it comes to cameras, one of the best things you can do is be as low-key about it as possible.
This might mean using a camera bag that looks like a purse or a normal backpack. It might also mean swapping a branded camera strap for a plain one. And even better if it’s a slash-resistant camera strap.
While not technically a camera strap, the slash-resistant faux leather purse straps from Arden Cove work great as a cross-body strap. I prefer these over some camera-specific options because they attach with a metal carabiner versus a more flimsy fabric strap.
Another thing to keep in mind is keeping your wits about you while you’re photographing. Don’t step away from your bags, leave them unzipped, or absentmindedly set down your phone to get the shot.
6. Always put your film in your carry-on luggage
Putting photographic film into checked luggage is not a workaround to avoiding the TSA X-ray. Checked bags undergo a much stronger type of X-ray that will almost certainly harm your film. They must make it into your carry-on bags.
Getting a hand-check for your film is the only way to completely avoid getting your film X-rayed, but this is not possible at every airport. Despite what they say about X-rays not harming film under 800 ISO, this is not always the case. There are both CT scanners and older versions out there that operate at different strengths.
Note: all of this only applies to unprocessed film. Film that has already been developed is safe either way.
Photographic Film + the TSA X-Ray
What most TSA staff (and people in general) will tell you is that modern X-ray machines will not damage film that is under 800 ISO. This is somewhat true and also not true not all. Most likely a 35mm 400 ISO canister of film run-through a single X-ray is going to be fine.
But what they don’t mention (or maybe they don’t know) is that the effects of the X-rays on film are cumulative. While one X-ray might not ruin a roll of film, a few X-rays can. I’ve experienced it.
Cumulative runs through an X-ray can fog up film, change its color, and create other streaks and bands across the image.
Other minor effects may be increased grain or reduced shadow detail. How film is affected can differ based on what type of film it is.
A lot of people—many photographers included—claim that it’s not something to worry about. I can only assume this is because they just haven’t experienced it. Perhaps it’s not a huge concern for the occasional or U.S. domestic traveler, but for film photographers who are digital nomads, long-term travelers, or people who travel internationally for any reason…it’s something to think about.
Some of my own examples of 200-400 ISO Kodak film that was ruined by four X-ray scans in 2024.

In this case, you can see both banding and overall ruddiness and discoloration to the image.

This frame scanned in slightly crooked. In addition to the light leak across the image, you can also see a bit of where the sprockets got hit with light as well.

Luckily when I’ve experienced this it only affected some of the rolls, and not every single photo on each roll. But I think it’s pretty obvious to see that X-rays do in fact, affect film.
This is particularly important to think about when it comes to international airports where hand-checks may or may not be an option.
The best way to prep film for the security experience is to put it into a clear zip-lock bag. This way security can see what it is and ideally help you get a hand-check. In the U.S. I’ve had TSA agents wave me over and offer a hand-check just from spotting the large bag of film I’m holding in my hand. (Maybe it’s also the pleading look on my face as I approach?)
While I’ve personally never had an issue getting my film hand-checked in the U.S., I absolutely have in other countries. And this is not just in airports…many tourist sites around the world require sending purses and bags through security scans as well.
How the film hand-check works
When TSA does a hand check they will take the bag of film while you continue your normal path through security. From there they individually swipe the film canisters and then test it for whatever it is they’re testing for. Sometimes this takes a few minutes.
I usually just hang out near the end of the conveyor belt, and most of the time someone will come to hand the bag of film to me. Other times they’ll call out “Who does this belong to?” and still other times they’ll just put it into an empty tray on the belt and not say anything at all.
Packing film for international travel
While you can put your film into any carry-on bag, it’s most convenient to put it into an accessible personal item vs a carry-on suitcase. To me, it’s just easier to get it in and out of that bag while going through security.
Most people would probably suggest keeping film within its protective plastic case to keep it safe while it’s being jostled around in your bag. I, however, am often short on space in my carry-on luggage and usually remove those containers. Call me a rebel.
If, however, you plan on mailing your film somewhere to get developed, you might want to hold onto those. I’ve never had an issue with film canisters getting squished in my luggage, but I can’t vouch for the entire mail and shipping system.
Note on packing: When I’m traveling I often empty out the backpack that I use as my carry-on personal item and then refill it with just what I need that day. If you do something similar, just be sure to remember to put all of your film back into the carry-on when you’re packing for a flight.
The protective film X-ray bag
There is some debate on this topic. If you find that you often send your film through an X-ray and don’t see any way around it, one option is using a protective film guard X-ray bag. These lead-lined bags can protect film under 800 ISO from low-dosage X-rays.
However, these do not work against the checked bag X-rays. And they also may not work against carry-on bag security X-rays anyway. As there are agents actively looking at items as they pass through the X-ray, they may be inclined to increase the level of X-ray to better see inside the bag. Thereby rendering the bags pointless.
I have not personally tried this option so I can’t vouch for it. That being said, there is an alternative to taking your film through (more) security…
Get film developed locally
The next travel tip for film photographers would be to avoid the X-rays completely. One way to avoid TSA X-rays (or avoid more of them) is to purchase and get your film developed locally in whatever country you may be in.
Now, this might not be super appealing or even possible in every location. But there are many places where it is!
These days pretty much every film lab is going to offer the option to digitize and send your scans over the internet. And generally, they’re also open to mailing your negatives to your home address for a small fee.
I’ve started compiling lists of highly rated film labs in various popular cities around the world:
Where to Get film Developed in Barcelona, Spain
Where to Get Film Developed in Lisbon, Portugal
5 Places to Get Film Developed in Madrid, Spain
(Most of these labs also sell film as well.)
If you are traveling somewhere there is not a viable film lab to use, you can also explore the option of mailing your negatives to one that is somewhere else in the country. Carmencita Film Lab has a few different locations in Europe and gladly accepts film via mail, as well as will mail negatives back to you.
Always choose ground shipping.
Other ways to protect film while traveling
Security X-rays are not the only thing to consider when traveling with film. Heat is another. This is probably more of an issue if you’re road-tripping or using a rental car. Parked cars can get extremely hot! Overheated film will start to bake and can take on some different hues than the way it was intended to look.
But then again some film photographers (like me) intentionally shoot on expired film to get different looks. Hot film can be beautiful too.
Airports that will and won’t hand-check photographic film
This list of airports that will and won’t hand-check photographic film is based on my personal experience only. No guarantees! This might differ depending on who’s working security, or how policies shift and change over time.
Use these travel tips for film photographers as a guideline on where it might be worth looking into alternative options.
Airports that will hand-check film
International: Athens International, Milan Malpensa
U.S. domestic: Austin Bergstrom International, Burbank International, Chicago O’Hare International, Hartsfield-Jackson Atlanta International Airport, Los Angeles International Airport (LAX), Oakland International, Palm Springs International Airport, San Francisco (SFO).
Airports that may not hand-check 35mm film
International: Humberto Delgado Airport AKA Lisbon Airport (LIS), Josep Tarradellas Barcelona-El Prat Airport (BCN), London Heathrow.
Note: some of these airports may hand-check film if you make prior arrangements. I was told that this is an option in Lisbon. London Heathrow would hand-check my 800 film, but nothing else. As you can see in the photo evidence above, all ISO film would be better off with a hand check.
FAQs about international travel with 35mm film
You can travel internationally with film and film cameras. Make sure that you pack all unprocessed film into your carry-on luggage and request hand-checks to avoid sending your film through security X-rays.
If you visit somewhere that requires an X-ray to enter it might be more challenging to get a hand-check than it is at the airport.
Never put unprocessed film into your checked bags when flying. The X-rays for checked bags are much stronger than those for carry-on luggage. Always put film into the bags that you will take onto the plane.
Film degrades easily in the heat, especially if it’s sitting in direct sunlight. It’s suggested to store film in the refrigerator, or even freeze it. (Just be sure and let it warm up before loading it into a camera.)
When properly cared for, processed film negatives can last for 1,000 years. When film has not been shot and developed, its longevity to create high-quality photos depends on factors like storage, heat, and X-rays.


